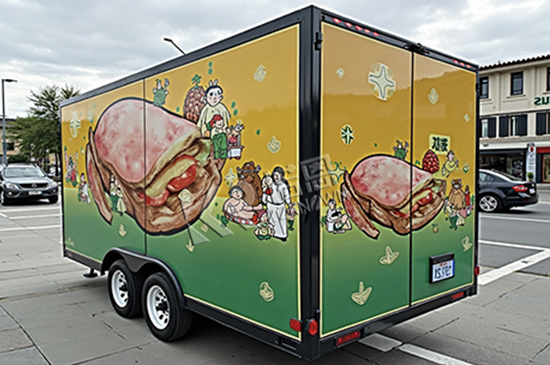
هنگامی که یک تریلر مواد غذایی برای صادرات ارسال می شود، برخی از قطعات محور یا چرخ ها ممکن است به طور جداگانه بسته بندی شوند تا حمل و نقل ایمن تر و آسان تر شود. پس از رسیدن تریلر، خریدار ممکن است نیاز داشته باشد که محور، صفحات فنر برگ، براکتهای U شکل، واشر، پیچها و چرخها را قبل از استفاده از تریلر مواد غذایی نصب کند.
این راهنما نحوه نصب محور تریلر مواد غذایی با گلگیر را مرحله به مرحله توضیح می دهد. این برای صاحبان تریلر مواد غذایی، خریداران تریلر امتیازی، و اپراتورهای تریلر آشپزخانه سیار که خواهان فرآیند نصب واضح و عملی هستند، نوشته شده است.
به عنوان یکChina food trailer factory, ZZKNOWN تریلرهای مواد غذایی با کیفیت بالا، تریلرهای امتیازی، تریلرهای آشپزخانه سیار، تریلرهای یخچال دار، فروشگاه های کانتینری و تریلرهای سرویس بهداشتی را برای مشتریان در ایالات متحده آمریکا، اروپا، استرالیا و سایر بازارها تولید می کند. برای تریلرهای مواد غذایی سفارشی، نصب صحیح محور بسیار مهم است زیرا بر تعادل تریلر، موقعیت چرخ و حرکت ایمن تأثیر می گذارد.
قبل از شروع، تریلر غذا را روی زمین صاف قرار دهید و مطمئن شوید که بدنه تریلر ثابت است. بهتر است برای این کار حداقل دو نفر ترتیب داده شود زیرا محور سنگین است و باید از دو طرف بلند و تنظیم شود.
Basic tools and parts usually include the following.
| مورد | هدف |
|---|---|
| Yellow fittings | Installed on the trailer holes and leaf spring plates |
| Black threaded rods | Used to connect the moving parts and spring plate positions |
| واشر | Placed before and after each hole to protect the connection point |
| Leaf spring plates | محور را پشتیبانی کنید و لرزش جاده را جذب کنید |
| U shaped brackets | Lock the axle and leaf spring assembly together |
| Nuts and bolts | Used to fix each connection point |
| آچار | Used for final tightening |
| لاستیک | Installed after the axle is correctly fixed |
Do not fully tighten every bolt at the beginning. برخی از قسمت ها را در حین تراز کردن کمی شل نگه دارید. This makes the later axle adjustment much easier.
The first preparation step is to install the yellow fittings.
اتصالات زرد رنگ را در سوراخ های منطبق بر روی بدنه تریلر مواد غذایی نصب کنید. Then install the same type of yellow fittings onto the corresponding positions of the leaf spring plates.
این اتصالات زرد به صفحه فنر و اتصال قاب کمک می کند تا در موقعیت صحیح قرار گیرند. مطمئن شوید که اتصالات به سوراخ های صحیح فشار داده شده اند و کج نشده اند.
میله های رزوه دار مشکی باید در موقعیت های اتصال بین اتصالات متحرک، واشرها، قاب تریلر و صفحات فنر برگ قرار گیرند.
The correct method is simple.
ابتدا یک واشر را روی اتصالات متحرک قرار دهید. سپس اتصالات را از موقعیت سوراخ صحیح عبور دهید. در هر دو طرف سوراخ باید از واشر استفاده شود. سوراخ بالایی به موقعیت بدنه تریلر و سوراخ پایینی به صفحه فنر برگ متصل می شود.
This step is important because washers help spread the pressure and reduce wear around the hole. For a food trailer axle, small alignment details can affect the final wheel position.
When installing the leaf spring plate, it is recommended to install the position with one black threaded rod first.
This position is easier to control and can save time for the next steps. After this point is connected, the rest of the spring plate can be adjusted more smoothly.
توصیه نمی شود ابتدا موقعیت عقب را نصب کنید زیرا معمولاً به نیروی بیشتری نیاز دارد و کار بعدی را سخت تر می کند. در کار نصب واقعی، شروع از نقطه کنترل ساده تر به جلوگیری از تنظیم مکرر کمک می کند.
Before rolling the axle into position, install the two leaf spring plates on one side first. صفحات فنر برگ باید به قاب تریلر متصل شوند اما همچنان باید مقداری حرکت برای تراز نهایی داشته باشند.
At this stage, the parts should look roughly assembled, but not fully tightened.
این طبیعی است. A little movement is needed because the axle must be positioned between the leaf spring plates later.
After the first black threaded rod position is installed, roll the axle into the correct position under the food trailer.
به موقعیت پیچ روی صفحه فنر برگ توجه کنید. محور دارای سوراخهای پیچ و مهره یا نقاط مکانیابی است. اینها باید تراز شده و در موقعیت صحیح قفل شوند.
The axle should sit in the middle of the leaf spring plate area. Do not let the axle sit too far forward or backward.
After the axle is in place, install the fittings according to the same washer and bolt method.
Connect the fittings and leaf spring plates together. Screw on the nuts, but do not tighten them too much at this stage.
همچنان بررسی کنید که محور در وسط صفحات فنر باقی بماند. If the axle is not centered, the wheel may not line up correctly with the fender, which can cause rubbing or uneven trailer movement.
در هر طرف تریلر یک نفر بچینید. Lift the axle slightly and shake the axle and leaf spring plates back and forth.
هنگامی که اکسل در موقعیت صحیح قرار می گیرد، ممکن است صدای واضح نشستن را بشنوید. At the same time, the axle should feel stable without obvious looseness.
این مرحله مفید است زیرا گاهی اوقات ممکن است اکسل هم تراز به نظر برسد اما به طور کامل در موقعیت مکانی صحیح قرار نگرفته است. A small shake can help the parts settle properly before final tightening.
After the axle is seated correctly, place the two U shaped brackets around the axle and leaf spring assembly.
Then place the matching plate under the corresponding holes. هر سوراخ باید با دو مهره یا قطعات بست صحیح ارائه شده با تریلر مطابقت داده شود.
با سفت کردن مهره ها با دست شروع کنید. After all nuts are correctly threaded, use a wrench to tighten them evenly.
Do not tighten one side completely before the other side is aligned. Tighten gradually so the pressure is balanced.
پس از اینکه محور، صفحات فنر برگ، میله های رزوه دار مشکی، اتصالات زرد، واشرها و براکت های U شکل به درستی قرار گرفتند، از یک آچار برای سفت کردن همه پیچ ها استفاده کنید.
Check every connection point carefully.
| Check Point | What To Confirm |
|---|---|
| Yellow fittings | در سوراخ های صحیح نصب شده است |
| واشر | Placed before and after the hole |
| Leaf spring plates | Not twisted or misaligned |
| Axle position | Centered on the spring plate |
| U shaped brackets | Evenly tightened |
| آجیل | Fully secured with a wrench |
| Fender clearance | Wheel area has enough space |
A good habit is to check each side twice before installing the wheels.
After the axle is fixed, lift the tire and align the wheel holes with the axle studs.
لاستیک را روی محور آویزان کنید. سپس مهره ها را روی گل میخ های رزوه دار در معرض قرار دهید. Tighten the nuts by hand first, then use a wrench to secure them.
After the tire is installed, check that it sits straight and does not touch the fender. The front axle and rear axle use the same installation method. Repeat the same steps until all axles and tires are installed.
The most common mistake is tightening all bolts too early. If the bolts are fully tightened before the axle is centered, it becomes difficult to adjust the position later.
یکی دیگر از اشتباهات رایج فراموش کردن واشرها است. واشرها باید قبل و بعد از سوراخ در صورت لزوم استفاده شوند. این از نقطه اتصال محافظت می کند و به قطعات کمک می کند تا ایمن تر قرار بگیرند.
You should also avoid installing the harder rear position first when working on the leaf spring plate. Starting from the black threaded rod position shown first makes the process smoother and less labor intensive.
از تجربه واقعی مونتاژ تریلر مواد غذایی، سادهترین روش این است که ابتدا نصب صفحه فنر برگ را تکمیل کنید، سپس محور را در موقعیت خود بچرخانید، و در نهایت براکتهای U شکل را نصب کنید.
یکی از موارد موفق مشتری بود که ابتدا محور جلو را نصب کرد و تمام مهره ها را در حین تراز کردن کمی شل نگه داشت. The axle dropped into position quickly, and the tires lined up well with the fenders.
یک مورد ناموفق به دلیل سفت کردن زود هنگام صفحه فنر بود. The axle could not sit into the correct locating point, so the customer had to loosen several bolts and repeat the alignment. این به زمان و تلاش اضافی اضافه کرد.
The lesson is simple. اول تراز کنید، بعد سفت کنید.
تریلر مواد غذایی تجهیزات پخت و پز، مخازن آب، یخچال، ژنراتور و گاهی اوقات پیشخوان های فولاد ضد زنگ را حمل می کند. The axle supports the trailer load and helps keep the trailer stable during movement.
If the axle is not installed correctly, the trailer may have uneven wheel clearance, poor balance, or abnormal shaking. For a concession trailer or mobile kitchen trailer, this may affect transportation safety and long term use.
That is why professionalfood trailer factoriespay close attention to axle position, spring plate alignment, and wheel clearance before delivery.
توصیه نمی شود. اکسل سنگین است و هر دو طرف باید بلند شوند و تنظیم شوند. دو نفر کار را ایمن تر و سریع تر می کنند.
No. It is better to tighten the nuts by hand first and keep the parts adjustable. سفت کردن نهایی باید پس از نشستن صحیح محور انجام شود.
Check whether the leaf spring plate bolts are aligned with the axle holes. You may need to slightly shake or adjust the axle until it drops into the correct position.
Washers help protect the hole area and make the connection more stable. They also help reduce direct metal wear during trailer movement.
روش نصب یکسان است. After finishing one axle, repeat the same process for the remaining axle and tires.
بله.ZZKNOWNمی تواندcustomize food trailerطرحبندیها، ساختارهای محور، گلگیرها، لاستیکها، آشپزخانهها، سیستمهای آب، سیستمهای الکتریکی و تنظیمات استاندارد محلی برای خریداران جهانی.
نصب محور تریلر مواد غذایی با گلگیر در صورت رعایت نظم صحیح کار دشواری نیست. ابتدا اتصالات زرد، واشرها، میلههای رزوهدار مشکی، صفحات فنری، محور، براکتهای U شکل و لاستیکها را آماده کنید. صفحات فنری را قبل از غلتیدن در محور نصب کنید. مهره ها را در حین تراز کردن کمی شل نگه دارید، سپس بعد از اینکه محور کاملاً قرار گرفت همه چیز را سفت کنید.
For buyers who need acustomized food trailerتریلر امتیازی، تریلر متحرک آشپزخانه، یا تریلر کامیون مواد غذایی، طراحی قابل اعتماد کارخانه و راهنمای نصب صحیح می تواند فرآیند راه اندازی را بسیار آسان تر کند.