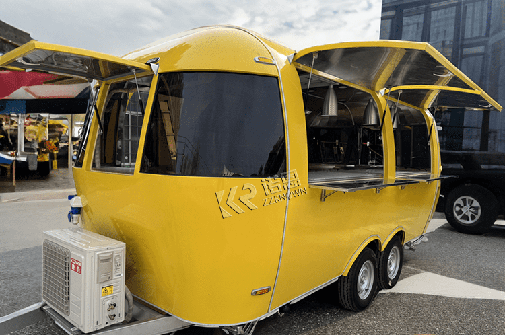
Installing a rooftop air conditioner is an important step when building or upgrading a food trailer, concession trailer, or mobile kitchen trailer. A properly installed roof-mounted AC unit can keep the interior workspace cooler, improve operator comfort, and help create a better working environment during hot weather.
The following installation steps are based on the actual rooftop air conditioner installation process shown in the videos.
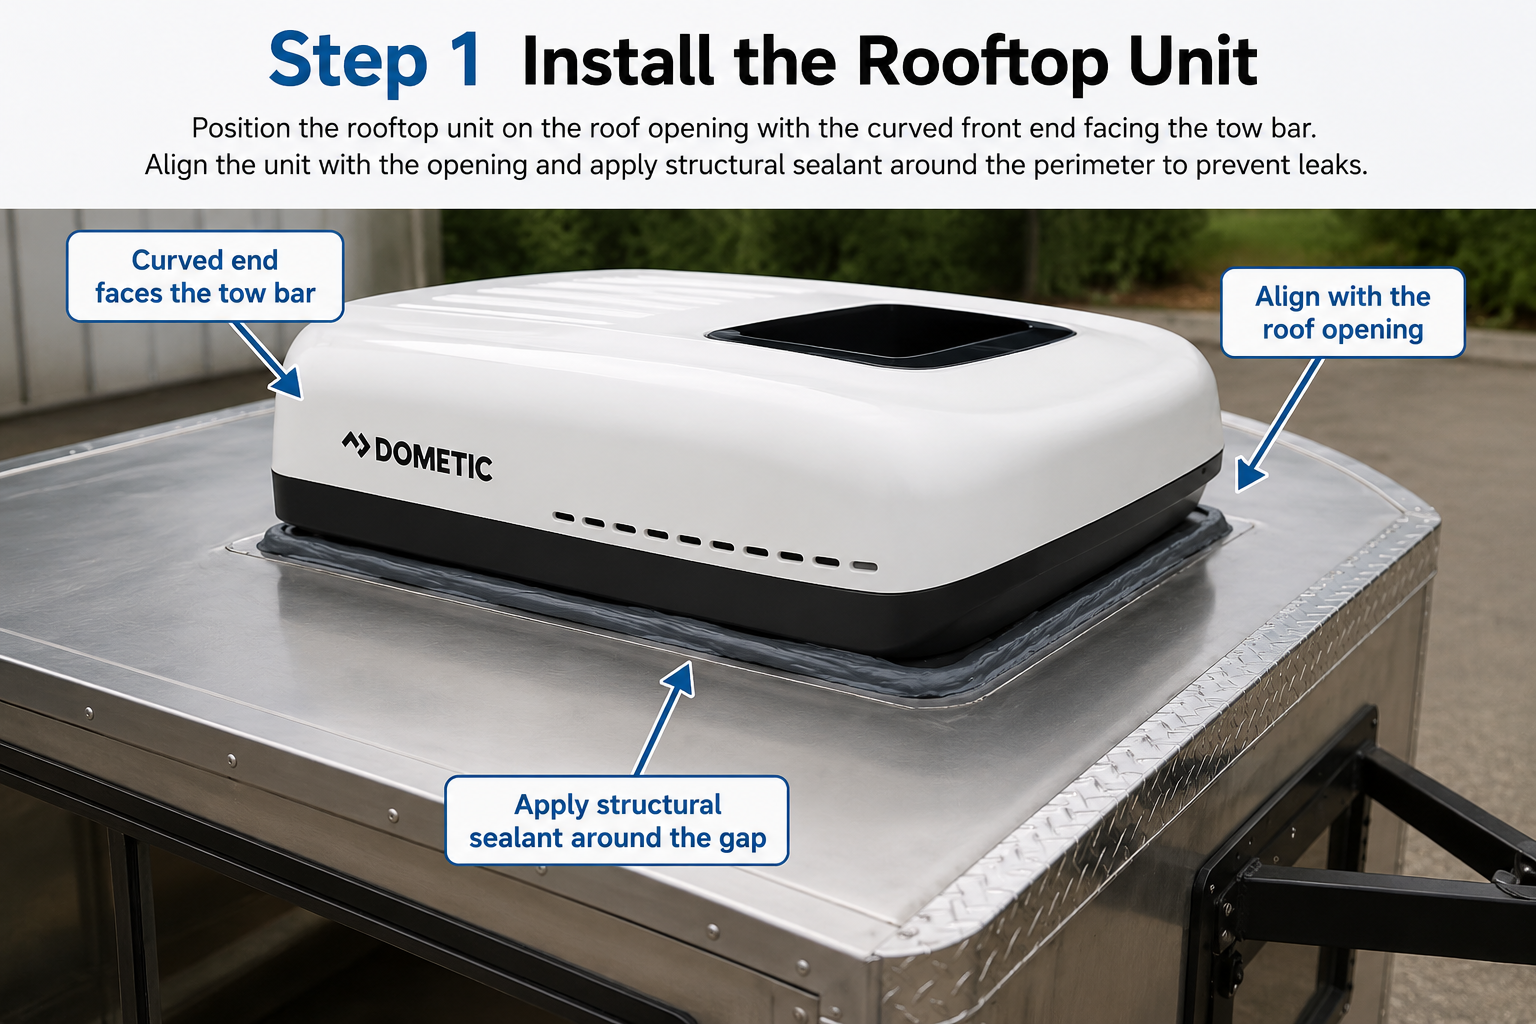
First, place the rooftop air conditioner on the top of the food trailer. Before lowering the unit into position, make sure the curved front end of the air conditioner is facing the tow bar direction of the trailer.
Align the bottom opening of the air conditioner with the pre-cut roof opening. Slowly lower the unit into place and check that it sits flat and evenly on the roof surface.
After the rooftop AC unit is positioned correctly, apply structural sealant around all gaps between the air conditioner and the trailer roof. This sealing step is very important because it helps prevent rainwater from entering the trailer through the roof opening.
Make sure the sealant is applied continuously around the contact area to improve waterproof protection.
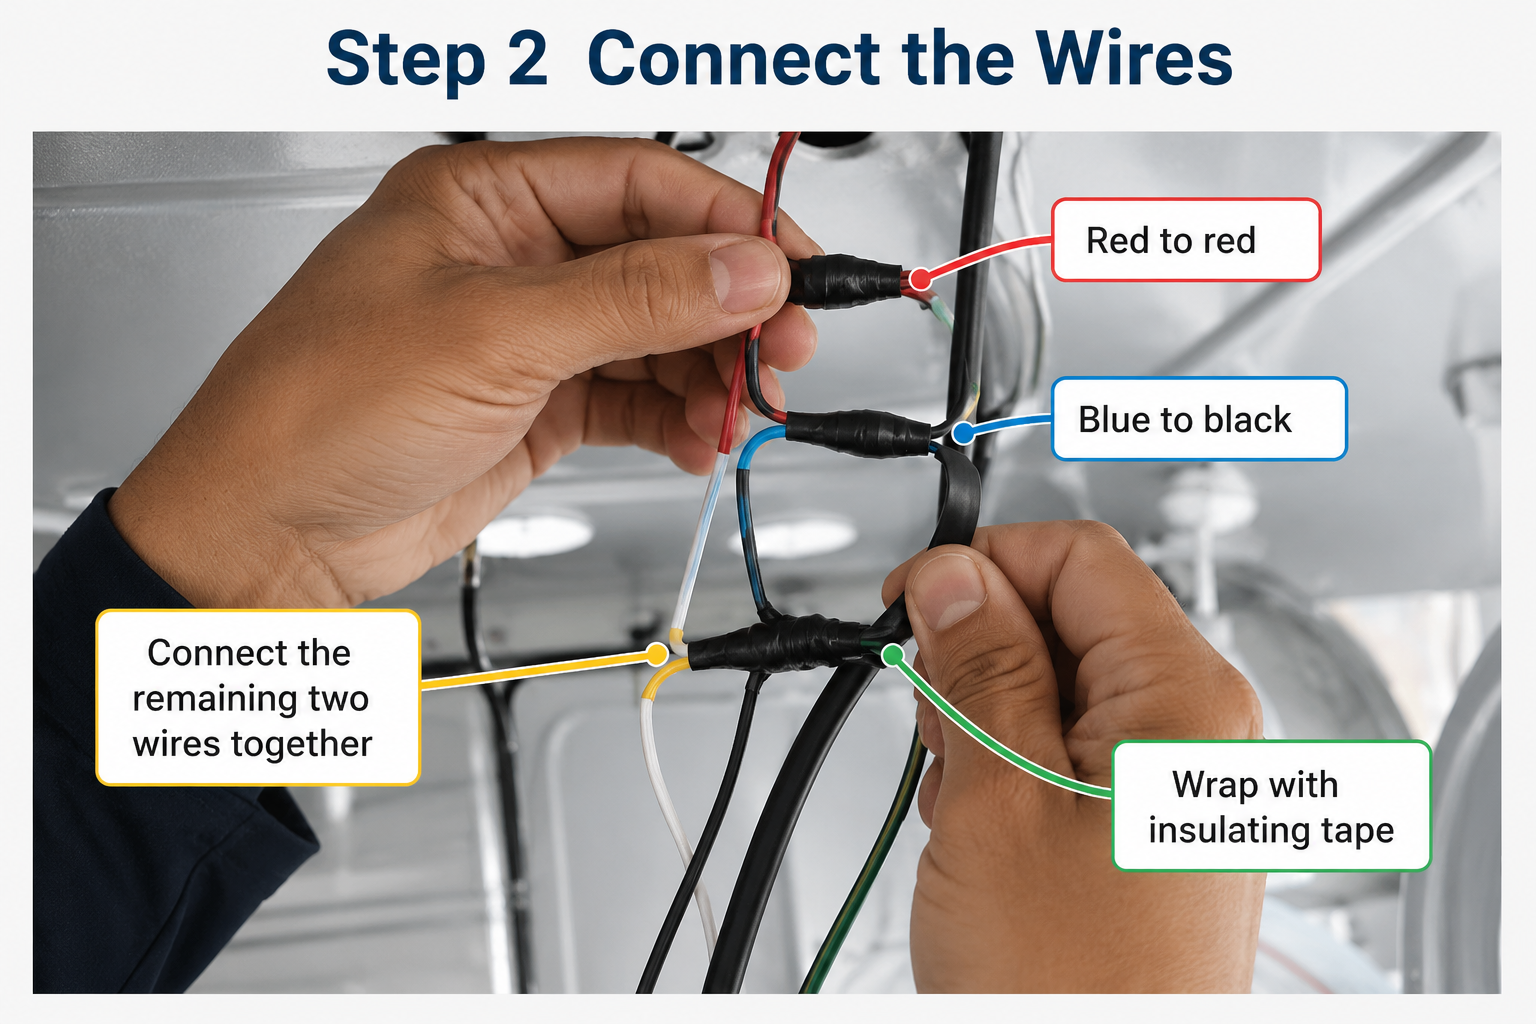
After the rooftop part is installed, move to the inside of the food trailer and connect the electrical wires.
Connect the red wire to the red wire, and connect the blue wire to the black wire. The remaining two colored wires should be connected together as shown in the video.
After the wires are connected, wrap each connection carefully with electrical insulating tape. This helps protect the wire joints and reduces the risk of loose wiring or electrical contact problems.
For safety, the wiring should always be checked according to the air conditioner model and local electrical standards before power testing.
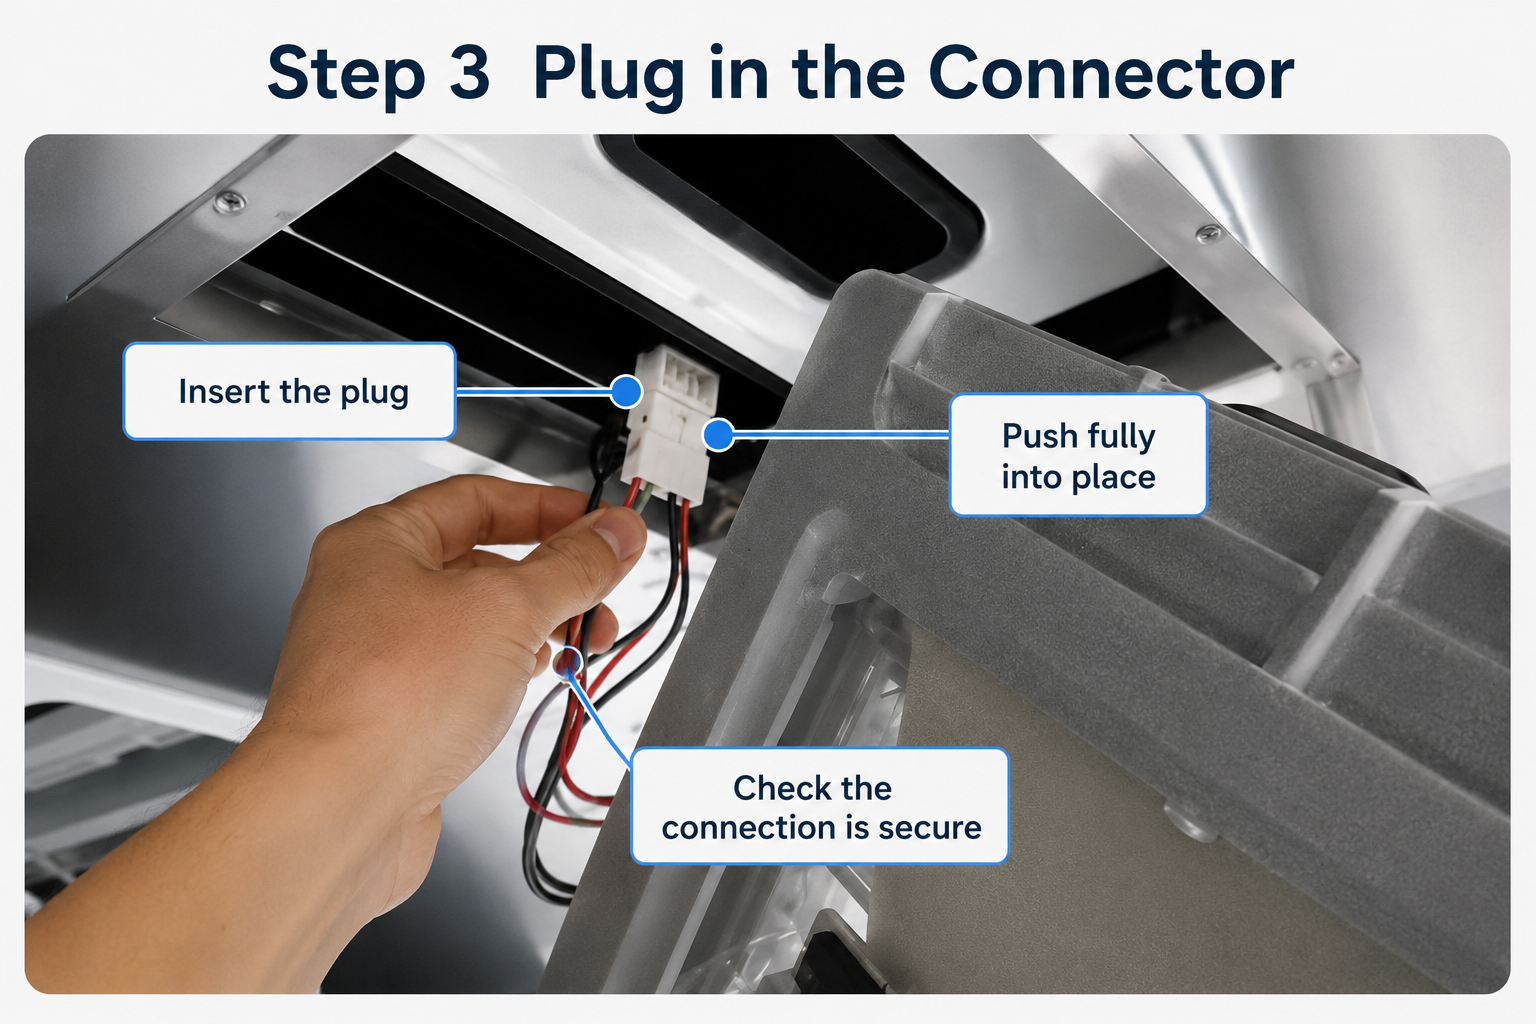
Next, plug in the connector shown in the video. Make sure the plug is fully inserted and firmly connected.
A loose plug may cause the rooftop air conditioner to fail to start or operate unstably, so this step should be checked carefully before closing the cover.
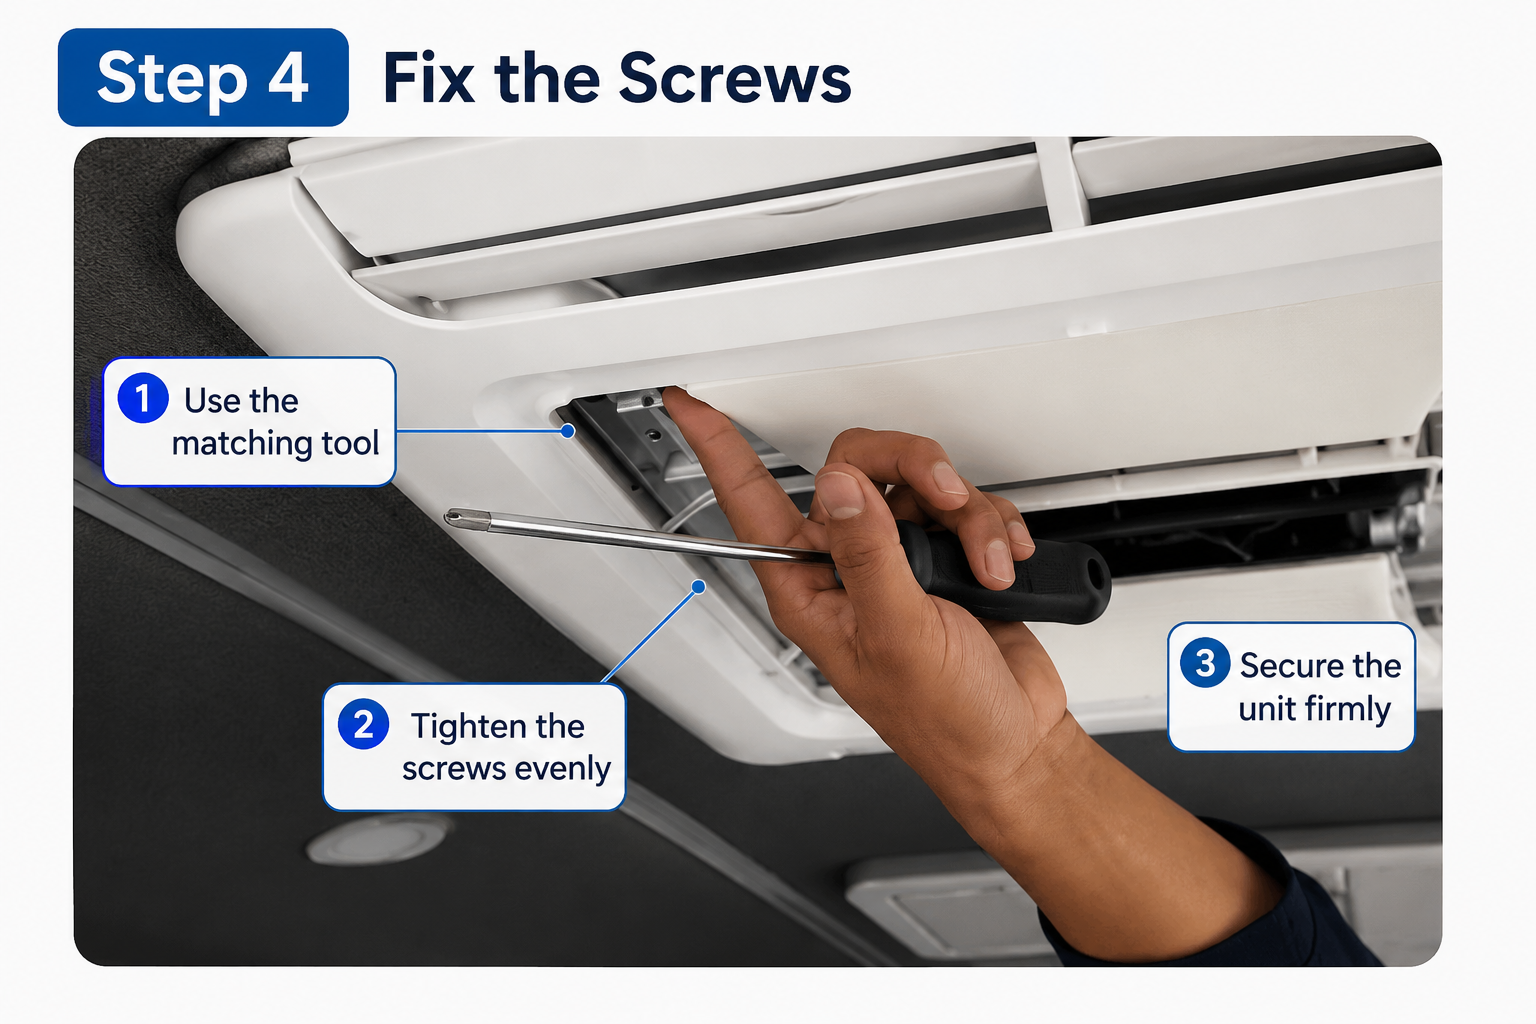
After the wires and connector are properly connected, use the matching tool to tighten the screws.
The screws help secure the inner air conditioner assembly to the rooftop unit. Tighten them evenly and make sure the unit is stable, but do not overtighten the screws to avoid damaging the plastic parts or mounting structure.
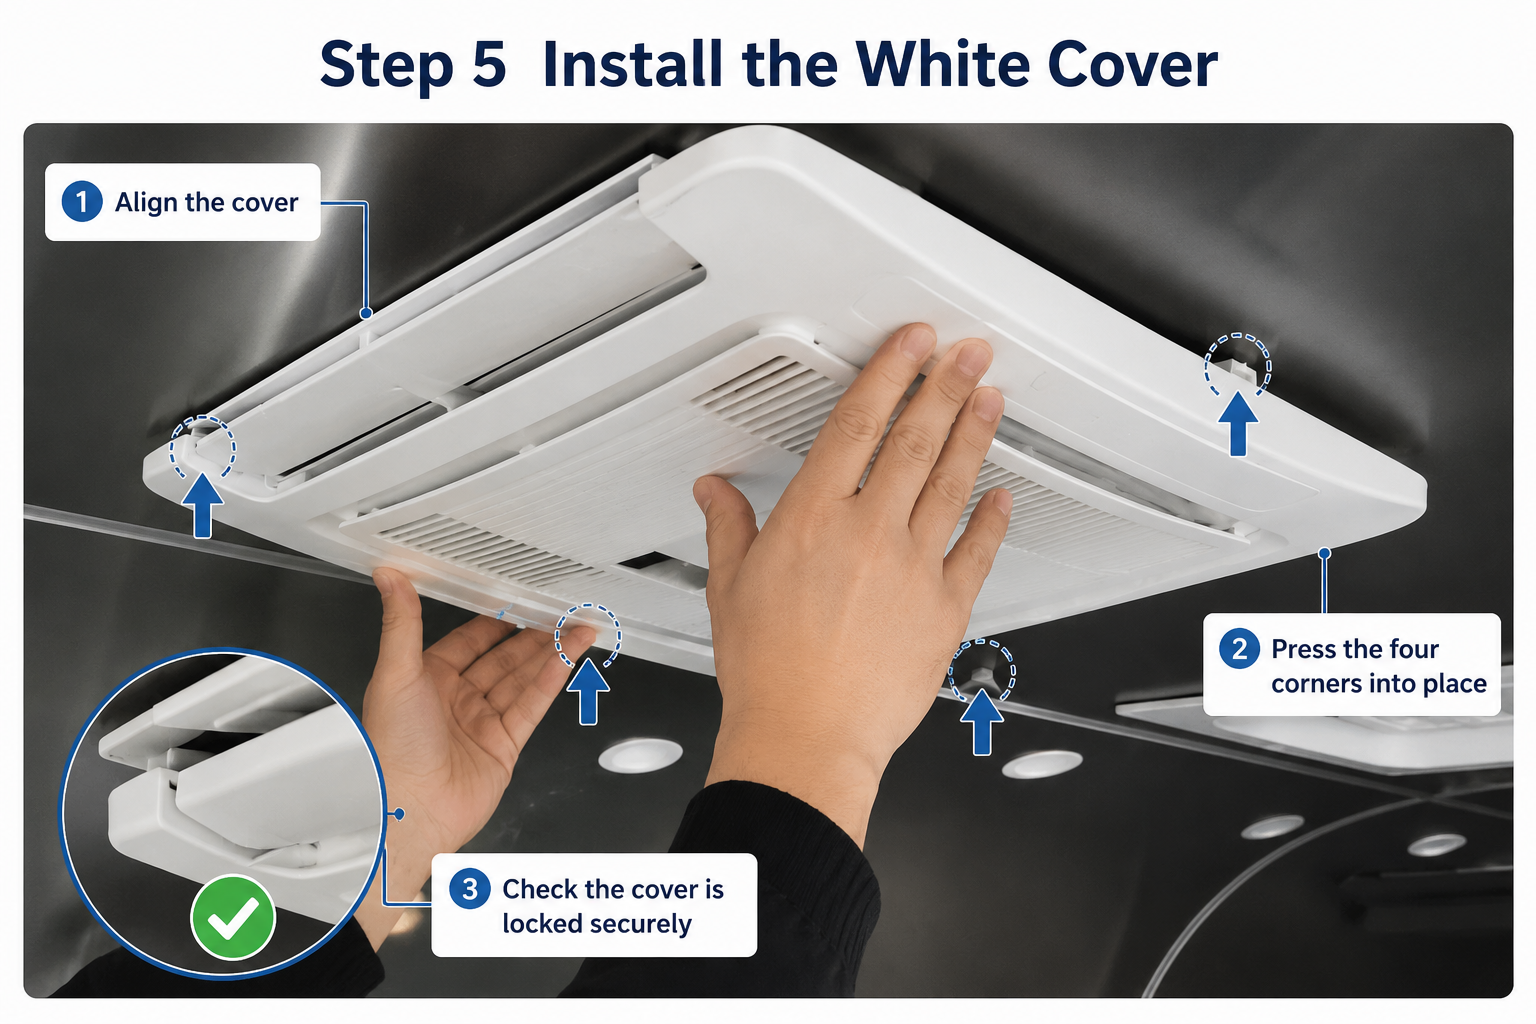
Finally, install the white interior cover. Align the cover with the four corner positions and press it into place until all four corners are properly locked.
After the cover is installed, check that the air outlet panel is flat, secure, and neatly fitted to the ceiling of the food trailer.
Once the installation is complete, check the roof sealant, wiring connections, plug connection, screw fixation, and interior cover. A well-installed rooftop air conditioner can provide reliable cooling for a food trailer, mobile food truck trailer, concession trailer, or catering trailer, making the working space more comfortable and professional.