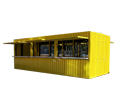
Sliding windows are an important part of a Round roof food trailer, concession trailer, or mobile kitchen trailer. They are commonly used as serving windows, ventilation windows, or customer-facing order windows. Correct installation helps the window slide smoothly, stay stable during transport, and provide a clean, professional appearance for the trailer.
This guide explains the basic steps for installing sliding windows on a food truck trailer, especially how to identify the inside and outside panels, the top and bottom direction, and the correct installation groove.
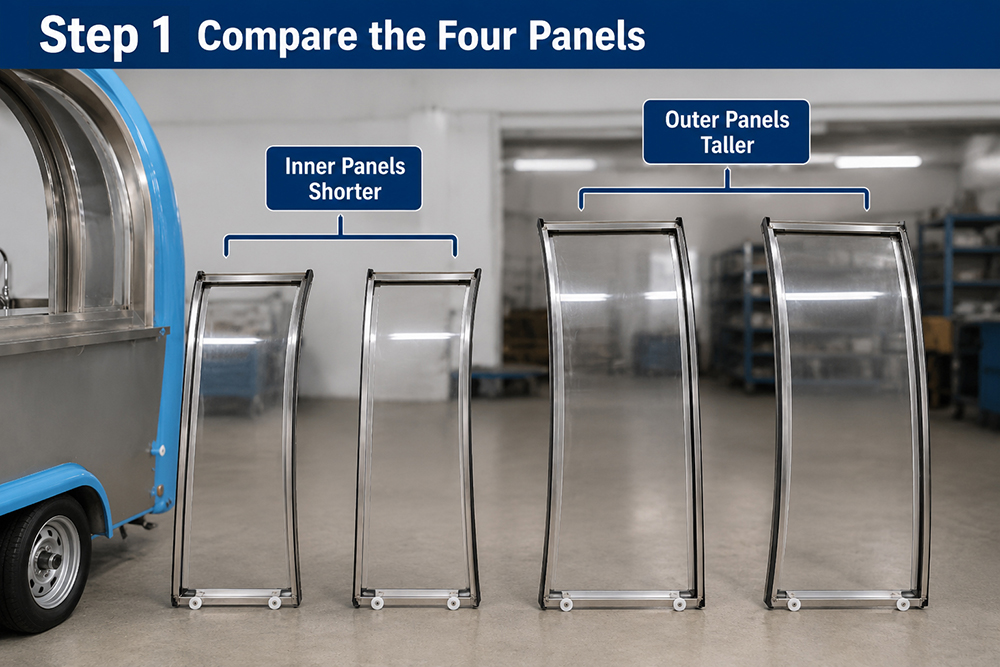
Before installation, first check the structure of the sliding window carefully. A sliding window usually has different panels for the inner side and outer side.
For a Round roof food trailer sliding window, the two shorter panels should be installed on the inner side of the trailer. The two taller panels should be installed on the outer side of the trailer. This design helps the window fit properly into the frame and allows the panels to slide correctly after installation.
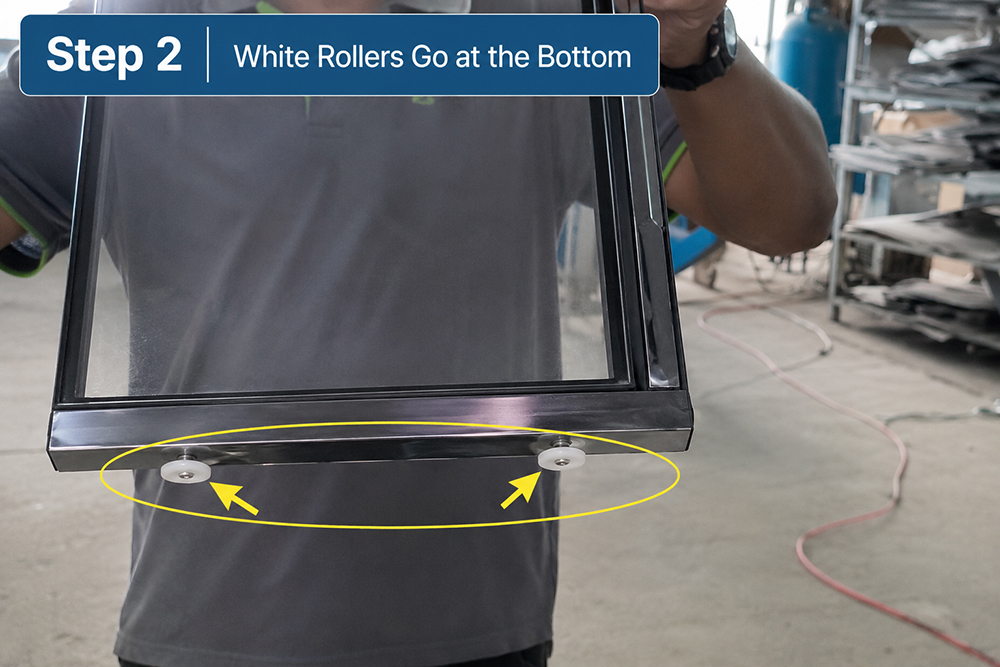
Next, identify the top and bottom of each sliding window panel. The panels with two small white rollers should be placed at the bottom. These rollers help the window slide smoothly inside the track.
If the direction is reversed, the sliding window may not move properly or may not fit securely into the window frame. Always make sure the rollers face downward before placing the panels into the grooves.
After confirming the direction, install the two shorter sliding window panels first. These panels should be placed in the upper and lower grooves closer to the inside of the Round roof food trailer.
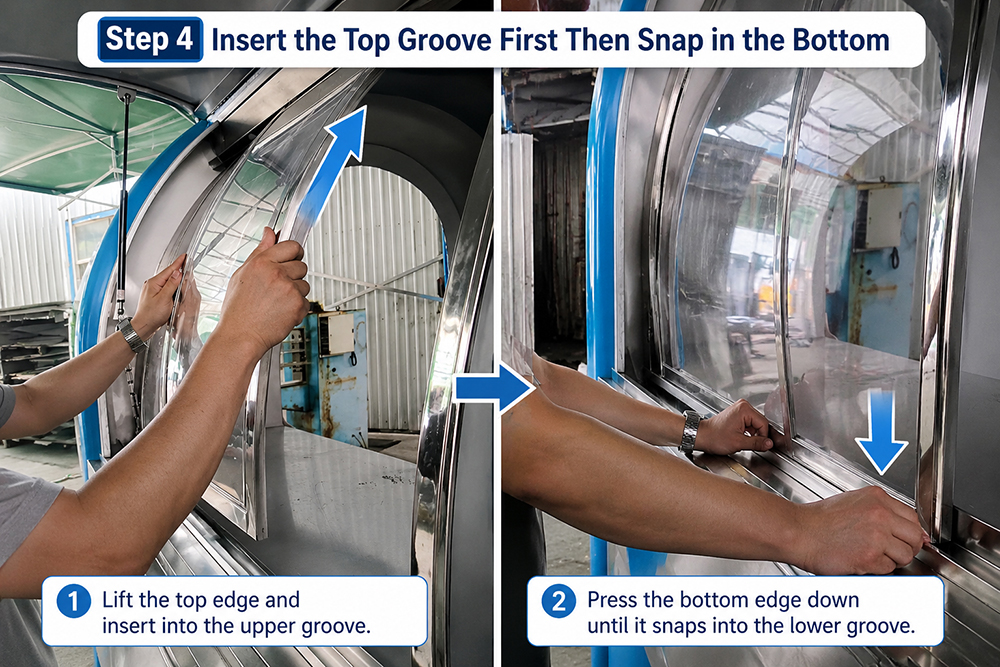
When installing, push the panel upward into the top groove first. After the top edge is fully inserted, gently press the bottom part into the lower groove. Make sure the panel sits securely in the track and can slide smoothly from side to side.
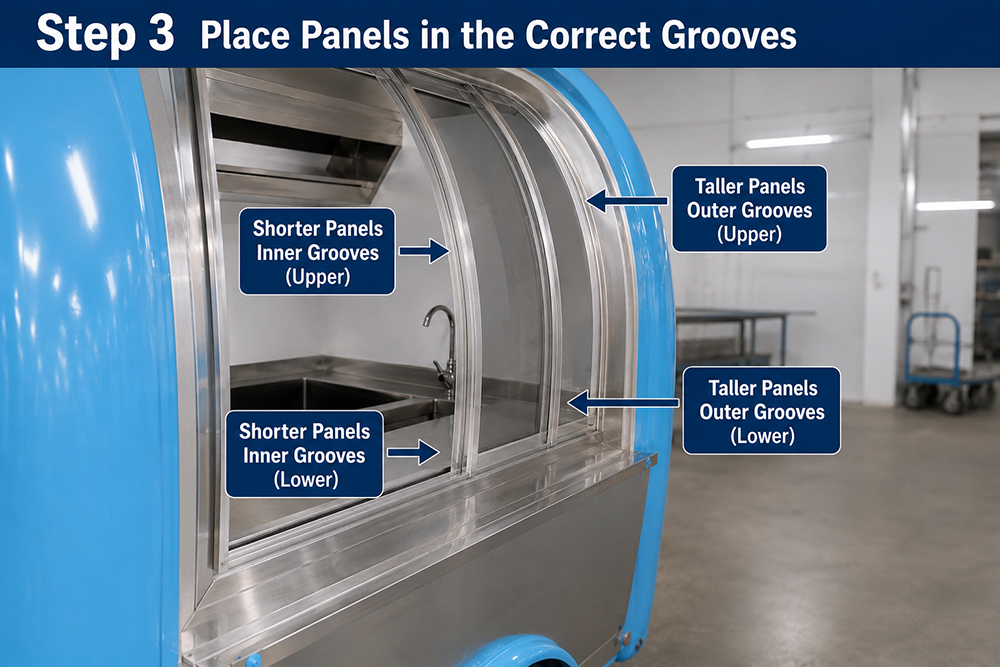
The two taller panels should be installed in the upper and lower grooves closer to the outside of the concession trailer. The installation method is the same as the inner panels.
First, insert the upper edge of the panel into the top groove. Then carefully guide the bottom edge into the lower groove. Check that the white rollers are placed correctly in the bottom track and that the panel is stable.
After all four panels are installed, slide each panel several times to test the movement. The window should move smoothly without shaking, jamming, or falling out of the track.
If the sliding window does not move smoothly, check whether the panels are installed in the correct inner and outer grooves. Also confirm that the shorter panels are on the inside and the taller panels are on the outside.
Before the Round roof food trailer is delivered or used for business, inspect the sliding window carefully. Make sure all panels are firmly installed, the rollers are at the bottom, and the window can open and close normally.
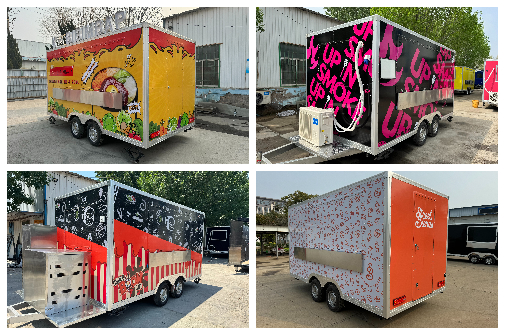
A properly installed sliding window improves daily operation for a food truck trailer. It allows staff to serve customers efficiently, supports ventilation, and helps create a professional appearance for mobile food businesses such as burger trailers, coffee trailers, ice cream trailers, and fast food concession trailers.
Installing a sliding window on a Round roof food trailer is simple when the correct order is followed. First, identify the inside and outside of the panels. Then confirm the top and bottom direction by checking the small white rollers. The shorter panels go on the inner side, while the taller panels go on the outer side. During installation, always insert the panel into the upper groove first, then place it into the lower groove.
Correct sliding window installation helps the Round roof food trailer stay safe, functional, and ready for daily mobile catering operations.